

Products to compare
One dishwasher family, two exact delivered models
GDF535PSRSS and GDF535PGRWW are separate full model numbers in the same GE dishwasher family. The links are uncommissioned. Match the ordered finish and complete model on the carton and appliance before installation, then apply the same condition, fit, work-scope, and first-cycle acceptance test.
Choose the finish and exact offer that fit the room and complete project budget. Accept either model only after the carton, appliance, written installation scope, connections, door movement, and first observed cycle show no unresolved mismatch, damage, leak, or omitted work.
These links lead to product listings or manufacturer buying options. PriceChomp earns no commission from them. How our links work.
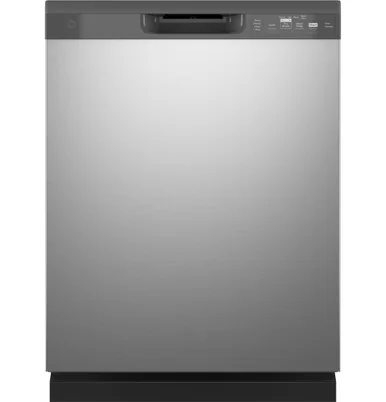
The stainless-finish delivery record
GE GDF535PSRSS dishwasher
Built-in dishwasher with front controls and stainless-steel exterior; nominal 24-inch installation class.
- Why choose it
- The full GDF535PSRSS code identifies the ordered finish and gives the delivery team, quote, carton, product page, and owner material one exact identity to match.
- The tradeoff
- GE currently marks this model as no longer manufactured and availability can vary. A product-family match does not prove that the delivered model, current remedy, or local installation scope is correct.
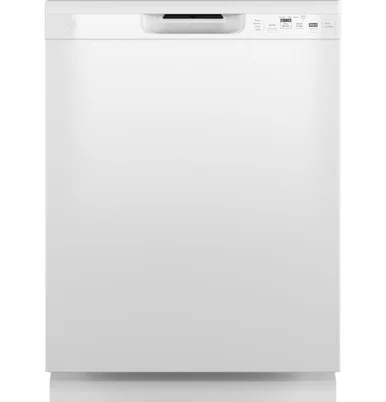
The white-finish delivery record
GE GDF535PGRWW dishwasher
Built-in dishwasher with front controls and white exterior; listed width 23.75 inches for a 24-inch cutout.
- Why choose it
- The full GDF535PGRWW code gives the white configuration its own exact identity so a similar model stem or retailer shorthand does not replace the carton and rating-label check.
- The tradeoff
- A familiar model family does not establish condition, fit, included connection parts, or completed installation. Verify every paid service and the first observed cycle.
Product details checked against the linked manufacturer and retailer pages. These are research-based comparisons, not hands-on tests. Check the selected model, current price, availability, and return terms before buying.
Build the acceptance record before delivery day
Save the order, full manufacturer model number, selected finish, product page, installation document, delivery window, current return terms, and every paid service. Separate delivery, installation, new connection parts, permit work, cabinet changes, and haul-away into individual line items. A single bundled total makes it harder to show which work was omitted.
Measure the opening again and photograph the water connection, drain path, electrical connection, floor, counter edge, trim, and route from the entrance. Record any known site condition in writing before the crew arrives. The appointment should confirm an agreed plan, not discover the project from scratch.
| Check | Evidence to keep | Decision it supports |
|---|---|---|
| Identity | Full model and finish on order, carton, and rating label | Confirms the delivered appliance |
| Condition | Carton and appliance photographs before installation | Separates transit damage from later damage |
| Work scope | Itemized services and parts | Shows what the crew must complete |
| Function | Dry inspection, leak check, and first cycle result | Supports acceptance or an immediate remedy |
Match the complete model number before unpacking
Read the carton label and compare every character with the order. Similar GE model stems can end in different finish codes, so the family name or a shortened retailer description is not enough. Confirm the color, control layout, handle style, and any ordered option before the old appliance is disconnected.
If the carton is wrong, damaged, wet, crushed, or resealed, stop and document it. Do not let schedule pressure turn the wrong appliance into an installed return problem. Ask the retailer or installer to record the exception through the required channel while the package is still present.
Inspect the appliance before it enters the opening
Photograph all sides as the packaging comes off. Check the door, corners, control panel, racks, spray arms, filter area, leveling feet, hoses, wiring area, insulation, and tub. Open and close the door without forcing it. A cosmetic mark that will be hidden is still something to record before installation, because accepting it is a separate decision from failing to notice it.
Compare loose parts with the model-specific installation material and the paid work order. Keep brackets, clips, sample products, manuals, and packaging together until the installation and first test are complete. Do not discard evidence while a damage or missing-part question remains open.
Verify site protection and each installation line item
Confirm how the crew will protect floors, doors, walls, and counters along the route. Photograph the surrounding area before work begins. If the opening, connection, shutoff, drain, or electrical supply differs from the written plan, get the changed scope and price before authorizing extra work.
Watch for the specific outcome, not just activity. The appliance should be level, stable, secured as directed, free to open, and connected without a pinched hose or stressed line. Haul-away, debris removal, trim work, and reconnecting adjacent items count only when they are actually completed.
Run a dry check before water enters the machine
Confirm that racks move freely, spray arms turn without obstruction, the filter and detergent dispenser are seated, the door latches normally, and no packing material remains. Check that the appliance is level relative to the counter and that the door does not rub nearby cabinets or flooring.
Inspect visible supply, drain, and electrical work before the machine runs. Do not reach into energized spaces or attempt a repair. A loose connection, damaged line, unexpected adapter, or unexplained opening in the cabinet is a reason to stop and ask the installer to resolve or document it.
Observe the first fill, wash, drain, and final inspection
Use the manufacturer's first-use guidance and stay through a cycle long enough to observe filling, circulation, draining, unusual noise, control response, and visible connections. Use a dry paper towel around accessible joints to reveal moisture without touching live components. Check the cabinet and floor again after draining.
A quiet first minute is not a complete test. Confirm that the unit does not move, the door seals, the drain path works, and no error appears. Save a short video of any repeatable sound, movement, message, or leak, but stop the cycle and water supply when the situation could cause damage.
Sign only the result you actually observed
Read the completion screen or paper before signing. Add every unresolved exception, including cosmetic damage, a missing part, incomplete haul-away, a leak, a fit problem, or a function that was not tested. Do not accept a clean statement in exchange for a verbal promise that somebody will call later.
Keep the order, photographs, installer record, model and serial details, support case, and names or timestamps together. Follow the retailer and manufacturer remedy paths within their current deadlines. The goal is not to argue at the door. It is to leave with an accurate record of what arrived, what was done, and what still needs a remedy.